Time: 3 hours
Serves: 6-8
Ingredients
Enchiladas
| Sauce
|
Beer-braised shredded chicken
- Cut up each chicken breast into 5-6 large chunks, removing any of the white fat.
- Generously salt and pepper the chicken. I used about 3-4 tsp of each.
- Smash your garlic cloves with the flat side of your knife, peel them and chop them finely.
- Pull the stems off the tops of your peppers and shake the seeds out of them as well as you can. It's okay if there are still a few left in there.
- Heat the 2 TBSP olive oil in a medium saucepan.
- Once it's hot, add the chicken chunks and cook for a couple of minutes.
- Add your chopped garlic and stir the chicken chunks around to make sure all sides get cooked on the outside.
- Once the chicken is all white on the outside, add your beer,1/4 cup lime juice and the dried chiles with the stems and seeds removed.
- Turn the burner to high to bring the mixture to a boil, then lower the heat to low and cook for 1-2 hours. While the chicken is cooking, make your enchilada sauce.
- You'll know the chicken is ready when you can break apart/shred the chicken really easily and the liquid is almost gone. You may have to turn up the heat on the burner at the end to cook off the liquid if there is still a lot left.
- Remove the pepper skins from the chicken mixture as well as you can. Some of the peppers have probably broken down by now, turning the mixture a red/orange color and that is good. Just take out any big flakes of the leftover pepper skins.
- Taste the chicken and add salt and pepper if you think it needs it.
- Cut your onion in half, peel it and chop it. Add the onion to the chicken mixture. I think I used about 3/4 of a cup of the diced onion and reserved some for topping the cooked enchiladas.
Enchilada Sauce
- Heat the 1/2 cup of vegetable oil in a wide skillet over medium-high heat for a minute or so.
- Add the 1/2 cup of flour and continue stirring for 3 to 4 minutes with a wooden spoon until the mixture is smooth and light brown in color.
- Add the dry ingredients - 2 tsp salt, 1 tsp pepper, 2 tsp garlic powder, 1 tsp oregano and 2 TBSP chili powder - and continue to cook for a couple of minutes, constantly stirring and blending ingredients.
- Add your chicken broth, mixing and stirring until the sauce thickens. You may need to turn the heat up to high here to make sure your sauce thickens. Just remember to keep stirring!
- Turn heat to low and let sauce simmer for 15 minutes. If it's too thick, you can add a little water. Set aside until you're ready for assembly.
Assembling the Enchiladas
- Preheat your oven to 350.
- Grate your Monterey Jack cheese.
- Lay your corn tortillas on a baking sheet and spray both sides with Pam or other spray oil. I had to do this in about 3 batches so do as many will fit on your baking sheet.
- Cook tortillas in the oven for about 3 minutes, until they are soft. This makes it easy to roll the enchiladas without breaking the tortillas. As an alternative, you can fry the tortillas each in oil for a minute or so but that just seems messy to me.
- When you have your stack of prepared tortillas, be sure your sauce, chicken filling and cheese are close by.
- Spoon a little of the enchilada sauce into the bottom of 2 casserole dishes.
- Dip your first tortilla in the enchilada sauce.
- Place about 2 TBSP of chicken filling in the center of the tortilla.
- Sprinkle about 1 TBSP of your cheese over the chicken.
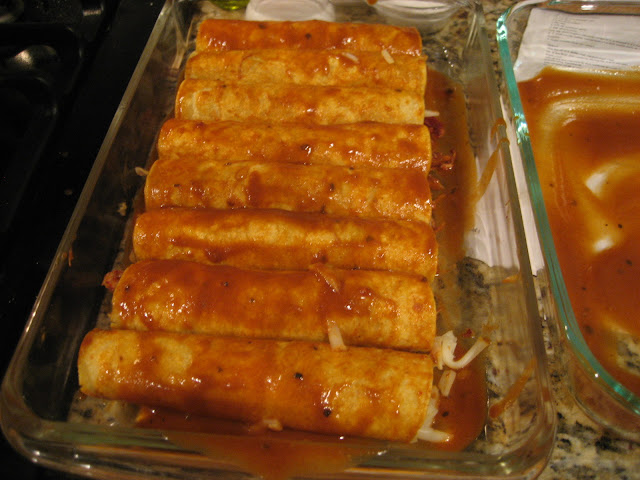
- Roll the tortilla up and set in your casserole dish.
- Repeat until all are done.
- Pour the extra enchilada sauce over the enchiladas until covered.
- Top with the Queso Blanco or Cotija cheese if using and extra onions if you like.
- At this point, you can refrigerate the casserole until you're not ready to bake.
- Slide your finished casserole dish into the 350 degree oven, uncovered.
- Bake the enchiladas for 15-18 minutes until bubbly.
*Dried New Mexican Red Chiles - You can find these either in the produce section by the fresh peppers (bell pepper, jalapenos, etc.) or in the Mexican aisle in packages. There are tons of different types of dried chiles - anchos, pasillas, guajillos, etc. - and it honestly probably doesn't matter which ones you get. You'll just get a slightly different flavor. Here are pictures and descriptions of all of them, including the New Mexico Red Chiles.
*Queso Blanco or Cotija Cheese - You can find this along with the rest of the basic cheeses (cheddar, monterey jack) in the refrigerated section. Cacique is the brand I most often see and you can see pictures of their products here.


No comments:
Post a Comment